

Hanukkah is from Sun, Dec 14, 2025 – Mon, Dec 22, 2025. Get prepared for the holiday with these fun family crafts!
Get crafty this holiday season with DIY menorahs! Whether you’re looking for a kid-friendly version or something more understated, these menorahs are sure to please this Hanukkah!
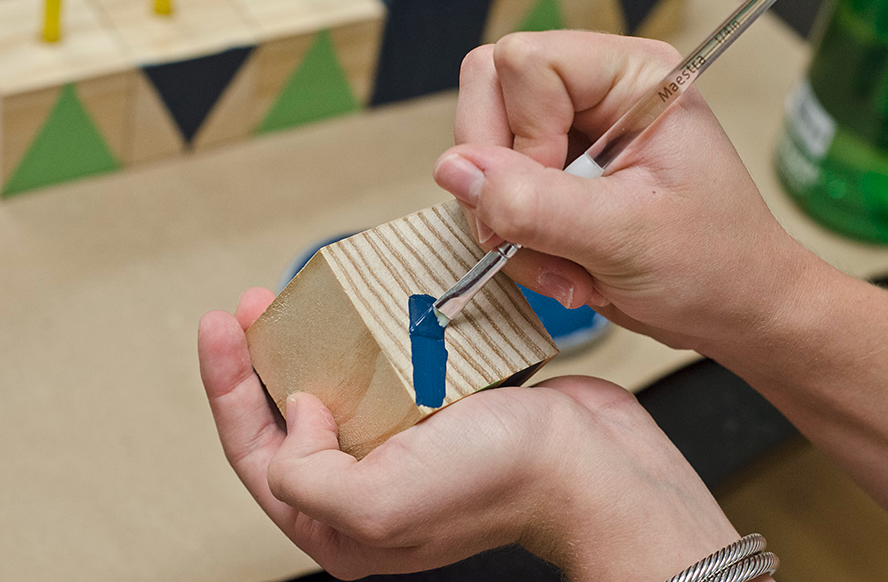
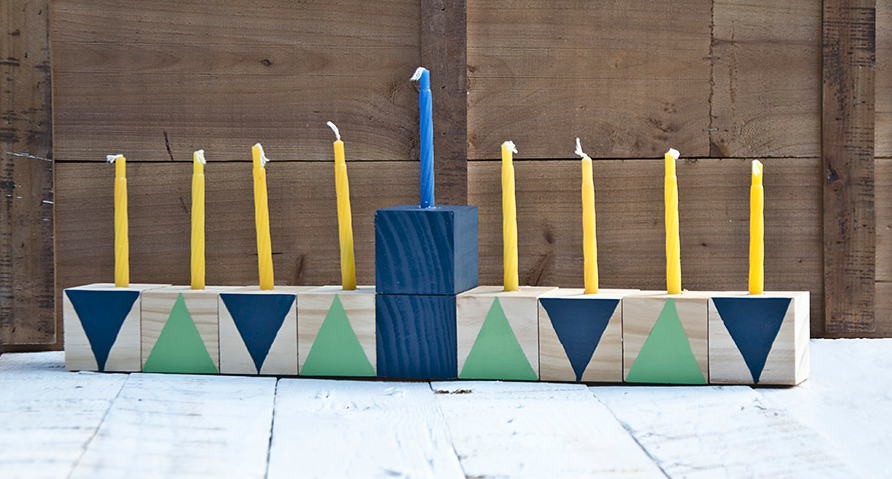
Wood Block Menorah
Supplies
- Ten 2-inch wood blocks (found at Hobby Lobby)
- Drill
- Paint
- Paintbrushes
- Hot glue gun
- Hanukkah candles
- Safety goggles
Instructions
Have a parent drill a hole about a half an inch deep in the center of nine of the blocks; this will be used to hold the candles in place. Be sure to use a drill bit that corresponds to the width of your candles. Remember to wear your safety goggles!
Use the paint to decorate each of the blocks as you like. Keep in mind that the block without a hole will be stacked below another block, so the patterns should match.
Once the paint has dried, use the hot glue gun to glue one of the drilled blocks on top of the block with no hole; this will create your shamash.
Once dry, glue four blocks on one side and four on the other side of the shamash. Let glue set and then insert candles into the drilled holes.

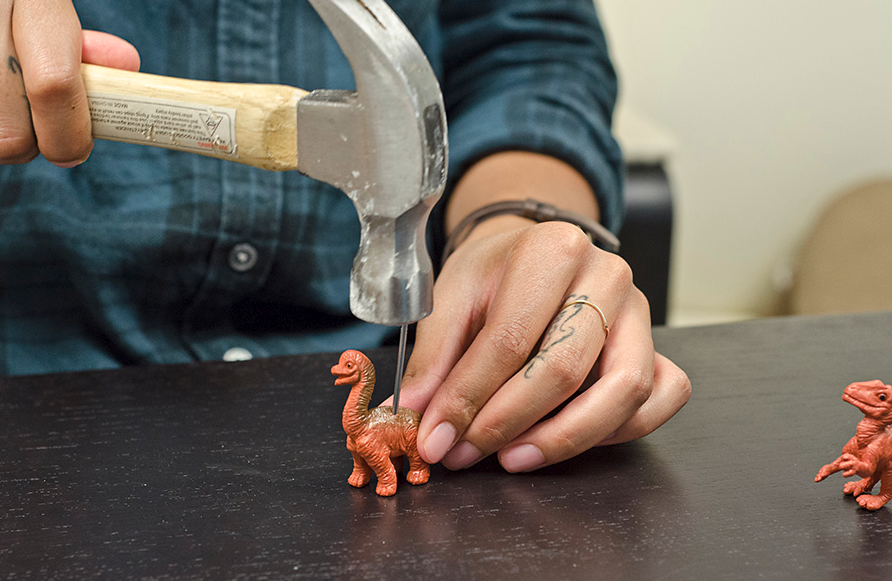
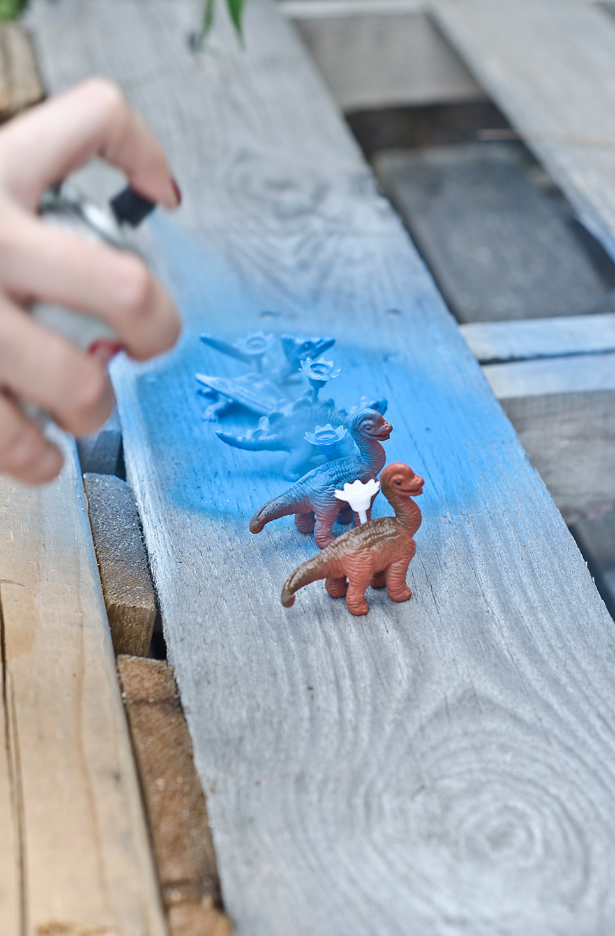
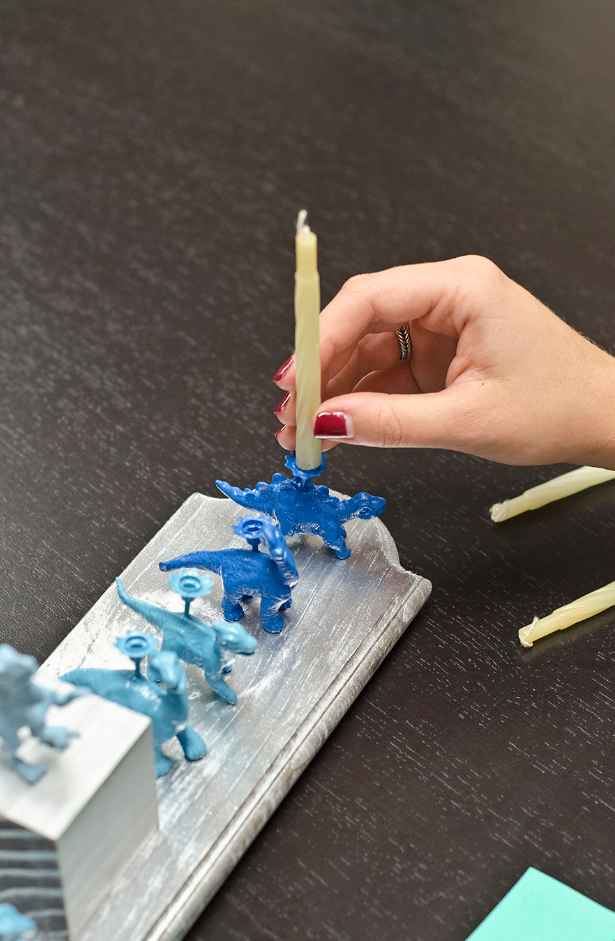
The Menorasaurus
Supplies
- 9 small dinosaur toys
- 9 birthday candle holders
- One 4-inch by 16-inch routered signboard (Found at Hobby Lobby)
- One 2-inch wood block (Found at Hobby Lobby)
- Hammer
- Nails
- Spray paint (We used silver, dark blue, blue and light blue)
- Hot glue gun
- Hanukkah candles
- Safety goggles
Instructions
Have a parent create a small hole for the candle holders on the top of each dinosaur by puncturing through the plastic using the nail. Hold the dinosaur steady and tap the nail into the back using the hammer. Remember to wear your safety goggles!
Remove nail so that hole is visible.
Place hot glue on the bottoms of the candle holders and insert into the holes, being sure to hold each candle holder straight until the glue is dried.
Once the glue sets, spray paint the dinosaurs, the wood base and the wood block (be sure to do this step outdoors!). We used silver spray paint for the base and the block and dark blue, blue and light blue for the dinosaurs to create an ombre effect.
Let the spray paint dry and apply a second coat if needed.
Once dry, hot glue the wood block to the middle of the wood base.
Use your hot glue gun to glue eight of the dinosaurs to the wood base (four on each side of the wood block) making sure to maintain even spacing throughout.
Glue the ninth dinosaur on top of the wood block; this one will serve as the shamash.
Place the candles into the candle holders and enjoy!
(For ours, our shamash dinosaur held the candle in his arms.)
Creative By Ashleigh Braun and Delia Albert
Related articles:
How Full is Your Bucket? Our Favorite Book for Teaching Kindness
Nature Notebooks: Take Learning Outside
Future Olympian: Mila Stinson (Gymnastics)